12 Days of Christmas ~ On the Twelfth Day...

Capture your Christmas Memories!

By now most of the preparations have been made. Hopefully your shopping is done and you've wrapped everything. Enjoy a Christmas cookie by the fire and see the excitement around you!

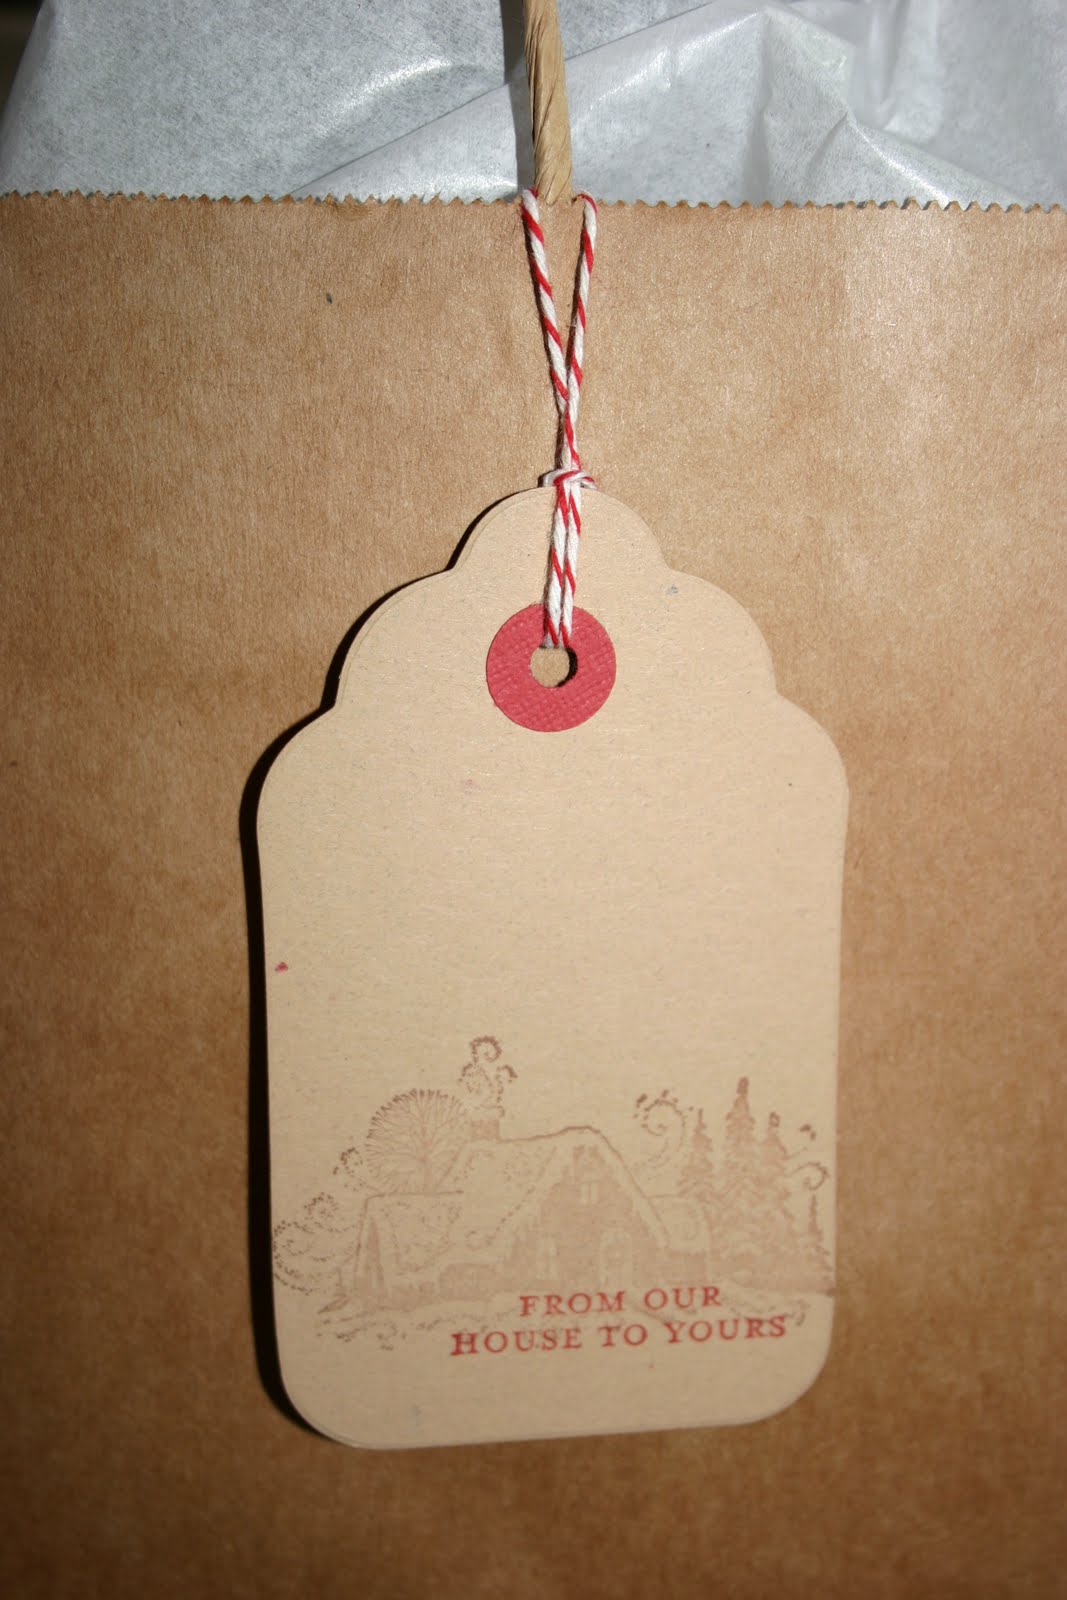
This is an important time of year to take pictures and capture the memories! Many of us scrapbook and appreciate the value of taking pictures and getting them into an album. If you aren't an avid scrapbooker, you still need to get these moments captured and preserved. An easy way to get photos in an album without feeling overwhelmed is by doing a mini themed album. This paper bag album I made is just one example of doing that. It's as easy as taking a stack of 3 lunch sack, folding them in half and binding them with ribbon. Add on some pretty paper and then fill them with your favorite pictures!


I wish all of you a great holiday. May you enjoy the time with your loved ones and treasure the memories! I will be back after the New Year with some fun Valentine's projects, but until then, all the best to you!
3

12 Days of Christmas ~ On the Eleventh Day...

It's not too late to send a letter to Santa letting him know just what you want left under your tree! With today's tech savvy kids, email is the way to go! This is a cute site that we found last year and both of my boys loved it. The letter is personalized and it's really neat how it comes back. (Hint: It's especially cute if your little one asks for any type of Star Wars toy!)
Here's the link: EmailSanta.com

I hope that all of your holiday prep is coming together nicely! I honestly don't know whether to craft or to start building an arc with all the rain we've had in California.... Come back for my final post in the 12 Days of Christmas series!
1

12 Days of Christmas ~ On the Tenth Day...

I picked up a great magazine this year called "Food Gifts" from Better Homes and Gardens. In it were so many ideas for creatively packaging different types of food gifts. There were also a lot of yummy recipes. If you can still get your hands on this publication, I highly recommend it. The packaging ideas can easily be adapted for any holiday; I think I will be using this all year!

One thing that really caught my eye was one feature for dipping different items in chocolate. Not a new idea necessarily, but it caught my eye and I was inspired. For little "Thinking of You" gifts for a few people at work, I decided to make some chocolate dipped candy canes and pair them with some hot cocoa.


To make the candy canes, I used a bag of milk chocolate chips and slowly melted them in the microwave. I had several unwrapped candy canes standing by and a large piece of parchment paper layed out on the counter. When the chocolate was melted and smooth, I just tilted the bowl and dipped the candy canes. I set them out on the parchment to set and in an hour they were ready to package. After the candy canes were dipped, we had leftover chocolate. My boys were rummaging through the pantry and fridge finding things for me to dip. They gave me everything from graham crackers to bacon.... yes, bacon. We've heard of it from state fairs and other venues, but hadn't tried it before. It was a hit!


To package up the candy canes and cocoa, I put them in a cellophane bag and tied it with a punched tag, topped with a snowflake. These would be easy to mass produce for any group you want to give a little something sweet to!
6

12 Days of Christmas ~ On the Ninth Day...

This year we are sharing some of the goodies from our summer trip to Montana. While in "Big Sky" country, I picked lots and lots of raspberries. I made lots and lots of raspberry jam. My father-in-law has an amazing garden and the raspberries were just one of my favorites. Not only does he have a great garden, he also keeps bees. Along with our jam, we came home with lots and lots of raw honey. It's so delicious and we thought we'd share it with a few friends this Christmas season.


I put together simple gift bags for what I am calling "Christmas Morning Biscuits." They can simply mix the dry biscuit ingredients with milk and bake up biscuits. Then, they can top their warm biscuits with jam and honey... yum!


I kept the packaging super easy here. I just added the jars to a kraft bag, stuffed in a little tissue and tied on a stamped tag. Hopefully it will be a big hit with our family friends!
0

12 Days of Christmas ~ On the Eighth Day...

Today I'd like to share a little card gift set. These 3 x 3 notecards would make a great little gift! Tucked in the matching Kraft bag, they are super cute and ready to go.

The cards are simply 3 x 6 pieces of Kraft cardstock, scored in the center and jazzed up with patterned paper, ribbon and a handmade snowflake embellishment. The Stickles on the snowflake adds a little touch of sparkle!


To package them, I used a mini lunch-style Kraft bag. I finished the end with a scallop punch and folded it over. It's held secure with a band of the same patterned paper and a matching snowflake scallop.


The cards and envelopes tuck away neatly inside of the bag and are going to make someone happy this holiday!
5

12 Days of Christmas ~ On the Seventh Day...

On the Seventh Day of the 12 Days of Christmas post, I'd like to share a few of my favorite things... I know I'm no Oprah, but hey, I have a few things under $20 I thought would be fun to showcase here. You might even need some last minute gift ideas and these may just fit the bill!

For Crafting: For cards, boxes and lots of other items, I love the Martha Stewart Score Boards. I have the Scor-Pal too, and while I like it, I have to give a nod to Martha here. I like the smaller increments on the score marks and the included envelope maker is fantastic. And what else? The top opens up for storage of your scoring tool.... brilliant! Of course these are available lots of places, but on Splitcoast Stampers you can get a coupon to use at Micheals for 50% a Martha Stewart item.... makes this an even better find! Here's the one from Amazon...

In the Kitchen: From Williams Sonoma - One of my favorite little kitchen gadgets. The best set of peelers I have ever owned. Not just for peeling, there is one in the set that does a matchstick cut that is great! They don't rust and they haven't seemed to dull at all. Love them!
Swissmar Peelers, Set of 3


For Beauty: I am a big fan of Philosophy brand products. I love their body washes and facial cleanser "Purity." But I really love, love, love the moisturizer "Hope in a Jar." It's light and not greasy at all, but it really works great. It's available a lot of places, one being Sephora.

For Family Fun: At least for my family, we have really been enjoying the new line of Lego games. My boys love to build the game board and then we all play them. They are pretty fast paced and easy to follow. Any Lego lover in your family would enjoy these, and I'm always a fan of getting everyone around the kitchen table for an old fashioned, non-technical, not battery operated, unplugged game! They have several of these games at most of the big stores... here's one of them from Target.
2

12 Days of Christmas ~ On the Sixth Day...

So how is your present wrapping coming along? Do you wrap as you go or do you wait and set aside some time to wrap everything at once? Do you keep it simple or do you use your packages as yet another way to showcase a little crafty goodness?

For the most part, I am a little fanatic about wrapping. I love to spend lots of time making the packages really nice, no matter what's underneath the pretty wrapping. Sometimes I love using plain or solid color wrapping paper and jazz it up with some patterned scrapbooking paper. Other times it's just as simple as adding a special tag. What I'd like to share today are two gift bag ideas.
First, adding a little extra something to a bag. Here I made a gift tag and matched with tissue paper and ribbon to bring it all together.

Another idea was to take an otherwise plain Kraft bag and add a little Santa magic to it. If you'd like to see how easy this is, hop on over to the CutCardStock blog to see my tutorial. It's easy peasy and you'll be the hit under the tree!

5

12 Days of Christmas ~ On the Fifth Day...

Today I have a couple of festive cards to share! I love simple, clean cards... even when it comes to holiday cards. And, in case you haven't noticed, I love a little Kraft cardstock in lots of my projects.


This year I sent out photo cards for my family. Easily uploaded onto Clark Color and they have lots of cute templates to choose from. When you have tons on cards to send out at Christmas, it can be very overwhelming to handcraft all of them. My solution to that? I sent out picture cards to everyone and I handcraft a few cards and use them on special gifts or attach them to plates of goodies I hand out to neighbors, co-workers, etc. I think it's important to strike a balance, especially at this time of year, between getting the many tasks done and still doing what you love. Use premade pie crusts, do some of your shopping on Amazon.com, add a little tag to a bottle of wine for an easy hostess gift and don't feel like you have to send a handcrafted card to everyone on your list! Tomorrow I will be sharing some craftiness when it comes to gift wrapping and packaging.... Enjoy!
5

12 Days of Christmas ~ On the Fourth Day

For a lot of us I am sure, it's just not the holidays without yummy goodies. Nothing like a cookie that Grandma used to make every Christmas to take you back! It's funny that there are certain foods that we wait until a particular time of year or holiday to eat, right? I don't know if it's because we don't want to indulge outside of the holiday or that the special treat is reserved as the stamp of that holiday. I love the tradition of treats, but I also love trying new things this time of year. But then there are also treats that are a trademark of others and I don't even attempt to make them myself - my mom's fudge is one of those things for me! Today I am sharing two cookies with you... well, the pictures and the recipes of them...

First, a very traditional Christmas cookie, but new for me this year. So simple and so festive, but I have never made Spritz cookies before. My friend and Pampered Chef Consultant Teri gave me the recipe and the cookie press to use. Lots of fun and very easy to make yummy cookies. (Or so I hear from my hubby and boys.... I can't actually eat the cookies because I am Gluten & Dairy free. They were fun to make though!) So, on to the cookies....


Here's what you'll need:
1 1/2 c butter (3 Sticks, softened)
1 c sugar
1 egg (not pictured above... he showed up late to the party!)
1 t vanilla
3 1/2 c all-pupose flour
Colored sugar (optional)
Cream the butter and sugar in mixing bowl. Add the egg and vanilla and mix well. Add flour, one cup at a time and mix well. Fill cookie press and press cookies onto cookie sheet. (I tried to put them on the sheet with parchment paper, but they wouldn't stick enough to separate from the press. Best to put them straight on a cookie sheet or stone.) Sprinkle with colored sugar or sprinkles. Bake at 375 degrees F for 10-12 minutes until firm, but not brown. Cool on rack.

Makes about 6 dozen

The second cookie I am sharing today is one that I make often for my hubby and also for my father in-law. Every year for Christmas I whip up a couple of batches and one batch gets packed up and sent to Montana with my father in-law's gift. The recipe for the oatmeal cookies comes straight from the inside of the Quaker Oats tub. I've tried others, but this recipe is by far the best. The only variation I make is that sometimes I add Butterscotch chips and sometimes I add raisins. This batch is the Scotchies and next week I will make them with raisins for the Montana Christmas package.


Vanishing Oatmeal Cookies

1/2 c butter (2 sticks, softened)
3/4 c packed brown sugar
1/2 c white sugar
1 t vanilla
1 1/2 c all-purpose flour
1 t baking soda
1 t cinnamon
1/2 t salt
3 c quick oats
1 pkg butterscotch morsels or 1 c raisins (optional)

Cream together butter and sugars in mixing bowl. Add eggs and vanilla and mix well. Add combined flour, baking soda, cinnamon and salt; mix well. Mix in oats and chips/raisins. Drop by small spoonful onto cookie sheet. Bake 8-10 minutes at 350 degrees F. Cool completely. Makes about 4 dozen cookies.
Finally, one tradition in our home is a Gingerbread house. We don't bake it, but rather buy the kit and have fun with all the sticky frosting and candy. This year, we got the pre-assembled house kit from Costco. It was a lot easier than years past because the house was built for us.
Enoy!

4

12 Days of Christmas ~ On the Third Day...

So despite the 80+ degree weather here in Southern California, I am trying to fill my home with Christmas spirit. Yesterday's candy making went well and today continues into the cookie baking and the annual Gingerbread house. Stay tuned for pictures of all the goodies...

Today I'd like to share a clever idea with you. Now, this is not my original idea... these have been around in crafting circles for a long time. I can't credit a specific person, but if the original creator of this idea is by chance reading, I'd like to say Thank You! The idea is creating a post-it holder out of a plastic picture frame. Simple? Yes. Economical? Yes. Cute? Oh, yes!


I love these because they are a little thoughful item that you can duplicate easily and put your own creative spin on. I like to make a few - wrap them in a cello bag, tie with a ribbon and attach a tag - and pass them out as little gifts. Just measure the opening of your frame, typically 4x6 or 5x7 depending on what size frame you have. Then create your insert with paper and any flat embellishments you want. Tuck the paper in the frame and stick the post it pad on the outside of the frame.


Here are a few different one's that I've made this year. I used different paper from my stash and added a scrap of the paper inside of an RSVP pen to make the little gift complete. The frames are from Wal-Mart, but I know you can find them at the dollar store too. Being such an economical gift, it's easy to make a bunch of them to give out. I am planning on sharing these with the office staff at school, along with a little bag of cookies.


Enjoy and stop by tomorrow for some recipes and other holiday goodness!

6

12 Days of Christmas ~ On the Second Day...

Happy Weekend everyone.... just two weeks left until Christmas! I hope you have your shopping done or at least almost done, and that you are able to enjoy the season. This weekend at the Crafty Corner we are decorating and baking... lots of fun! I have been crafting, but for today's post, I thought I'd share some photos.


I always seem to get a little reminiscent at Christmas; since becoming a mom, even more so. So I am taking a little look back today. I thought I'd share a picture of my boys from 6 years ago and show it along side a picture taken just last weekend when they both went ice skating for the first time. They are best buddies!

I also have a picture I found of me and my brother, many years ago. I think this picture was taken in 1978.... a real flashback!

Enjoy and stop by tomorrow for a little festive fun from Amber's Crafty Corner!

2

12 Days of Christmas ~ On the First Day....

Ok, so I didn't start on the 1st of December, but better late than never, right? I thought I would start a Christmas series of my own and share a little look in at the Crafty Corner during this holiday season. I will be posting every day, sharing a little crafting, tradition and maybe some holiday goodies, so check back often!

Today, I am sharing a little festive notebook. I like to keep this sort of notebook handy this time of year to jot down lists and reminders. With so much going on at the holidays, I need all the help I can get remembering and keeping things straight! I figure if I am going to keep a notebook, it might as well be a crafty one.

I just covered a scratch pad with some of Making Memories 8 x 8 paper. It's actually from last year's collection, but I love the style and colors in this paper pad. I have found that for these types of projects, using the red line tacky tape works great to keep things together during all the use.

The scratch pads are sold in stacks of 5 or 6 usually, and I've picked them up at Wal-Mart or Big Lots for pretty cheap. Grab a stack and make some.... change the paper for the seasons, or make a bunch and give them out as little gifts! Great stocking stuffers or little teacher gifts. Enjoy!
8

Holiday Tutorials

As you are preparing for your holiday gift giving, here are a few ideas I have to share...
Click on the title of each project to head over to the CutCardstock Blog to see all the steps in my tutorials. Enjoy!

1. Holiday Photo Gift Folder - A great way to give out family or school pictures as gifts...

2. Holiday Build-A-Box - A festive way to wrap up some baked goods for a neighbor or to tuck a little teacher's gift it... there are many possibilities!

3. Snowflake Mini Pizza Box - The size of this box can be adapted to fit whatever little goodies you want to tuck inside!

8